How to Care for Stainless Steel Pots and Pans
A PSA: you’re not doing it wrong if your pan looks like hell after caramelizing onions, or searing a pork chop, or scrambling eggs. Your stainless steel pans will occasionally require a little extra TLC depending on the work they’re doing—and knowing which technique to deploy so you’re not scrubbing your life away makes all the difference.
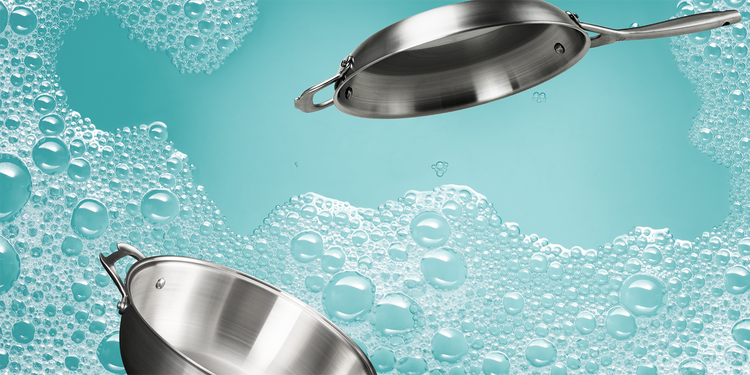
Read on for the basics on stainless steel care.
How To Clean Stainless Steel
First things first: is stainless steel dishwasher-safe?
It is! Minor messes can absolutely go through the wash. While it may lead to watermarks on the surface (easily removed with a quick polish), it will not affect the quality of your cookware in any way. Some nights are dishwasher nights, and that’s okay.
I went a little crazy with my sear, and now my pan is a mess.
Generally speaking, it’s best to soak a particularly messy skillet or pot in soapy water before tackling it with the rest of the dishes. If you’ve already done this, and scrubbed with every ounce of post-meal energy you’ve got, to no avail—here’s what to do.
1. Fill the skillet with a drizzle of dish soap and water. You don’t need much here, just enough to cover the bits of food you’re looking to clear off.
2. Set the skillet back onto the stove. Bring to a simmer.
3. Turn off the heat. Let the pan soak briefly.
4. Then, scrub. Throw on a pair of dish gloves and use a metal spatula or dish brush (think bamboo or plastic, not steel wool) to very carefully dislodge the stuck-on bits. Watch out for sloshes!
Carefully transfer back to the sink. Pour out the contents of the pan, and give it one last wash with soapy water as needed.
I’m proud of my patina, but things are looking a little gnarly. How do I keep my pans shiny?
Anyone who cooks with stainless steel on the reg knows that more often than not, the term “stainless” feels like a straight-up tease. Cooking is quick to leave its mark on stainless steel surfaces, especially when fats have a chance to seep into the pores.
Splattered skillet slopes, rough-looking rivets, and rainbow stains (also known as “heat tint”) are common signs of well-loved cookware. Here’s how to restore your pans to their fresh-out-of-the-box former glory.
1. Choose the right cleaner. Sprinkle a layer of non-abrasive cleaner like baking soda, Barkeeper’s Friend, or Bon Ami over the surface.
2. Create a paste, and polish. Use a bit of water and a soft sponge or cloth to work the cleaner into a paste. Polish the problem areas.
3. Finish with dish soap. Rinse in warm, soapy water to finish.
Okay, but what about the infamous “egg skin?” I HATE IT.
Whether scrambled, folded, or fried, the humble egg may be the most-cited foe of stainless steel, but it doesn’t have to be. Remember: preheat with patience, then add your cooking fat. Low-and-slow helps to prevent sticking.
But, stick happens. Here are a few solutions for tackling breakfast clean-up:
- Embrace the metal spatula. If you ask us, the best thing about leaving non-stick surfaces behind is freedom from scratch anxiety. A metal spatula works wonders on the sticky remnants of scrambled eggs. If you’re nervous about cosmetic scratching, swap it for a sturdy wooden spatula or spoon.
- Soak. Soaking the surface in warm soapy water will help to loosen eggs. Use the spatula to clear most of it away before scrubbing with a sponge.
- Polish as needed. To get rid of any stubborn discoloration or remaining food, follow the steps above.
On Seasoning Stainless Steel
What does “seasoning” a pan mean?
Seasoning, or curing, cookware refers to the process of building layers of residual fat, like oil, to aid in sticking. This step is most common to cast-iron or carbon steel cookware.
By heating the oil past the smoking point then letting the pans cool, the pores along the surface open and then seal back up, bringing a naturally low-stick surface closer to a non-stick surface in practice—without the need for chemical coatings.
Do you need to season stainless steel?
Technically speaking, no. Since oils and fats are a necessary step in cooking with stainless steel cookware, adding that extra step of seasoning beforehand will likely contribute little to the cooking experience. Plus, washing the pans after cooking will effectively remove the seasoning you worked so hard for, requiring another go.
The best way to avoid sticking without seasoning
The single easiest way to encourage a non-stick environment with stainless steel cookware is to heat your pans before adding fat. As the metal expands with the heat, the pores on its surface shrink, allowing the fats to form a better barrier along the surface.
How to season stainless steel
Alright, if you’ve read all that and are still intent on seasoning that sucker, here’s how.
1. Choose an oil with a high smoke point. Skip the olive oil for this, and choose vegetable oil, peanut oil, or grapeseed oil. When heated to the proper temperature, the oil and heat bond together into what’s known as a “polymerization”—this fills in the pores on the surface.
2. Place the pan on the stovetop. Make sure that the pan is clean, and completely dry. Apply a very thin layer of your cooking oil to the surface. Use a paper towel or clean kitchen towel to spread evenly.
3. Wipe off any excess. There should be no pooling or visible droplets on the surface.
4. Heat. You can season a pan on the stovetop or in an oven, depending on your preference. If you’re using the stove, ten minutes is sufficient over medium heat; if you’re using the oven, preheat to the smoking point of your oil and season for up to an hour. Pro tip: Place your pan upside-down on an upper rack, with a sheet tray on the rack below to catch any drips.
5. Let cool. Let the pan cool completely before storing or using. This is an important step in the curing process, so patience is key.
More cleaning questions?
Contact us at team@proclamationgoods.com, and we'll sort you out.